


“Fundamental” may have adapted a negative connotation in recent years, but there’s no humble in seeking advice on theoretically simple sartorial conundrums. In our current column, “Back to Basics,” we’re here to guide you through preoccupation’s most common and important fashion and beauty concerns.
Ironing is one of those stupefying household tasks that many folks do their most artistically to avoid entirely. Some people accomplish this by lay out serious dough at the dry cleaner, or by getting creative: In a pinch, I’ve suspended a shirt, wet out of the washing machine, with a row of clothes pins stole along the bottom hem to weigh down the fabric as it dried.
Neither of these way outs are as ideal as simply investing in a good iron and/or steamer and catch familiar with the best way to tackle a shirt collar. Let’s be open: it’s really not that hard, and nothing’s worse than wiggling to pick out an outfit before realizing your go-to undertaking pants are all bunched up at the knees. Not chic.
For expert ironing intelligence, I turned to Martha Stewart Living’s Gardens and Features Copy editor Melissa Ozawa, who broke the process down step by move. Read on for her top tips for achieving a perfectly crisp wardrobe.
Buy A Wholesome Iron
The most important step is perhaps the easiest. “Provide in a high-quality iron that lasts a very long lifetime,” says Ozawa. “Look for a reputable brand, something that’s heavier is richer reconsider. You don’t have to apply as much pressure for wrinkles.” That’s mainly important for tougher fabrics like cotton and linen, and if the iron has a steaming right stuff, that’s very useful, too.
Understand Your Fabric Technology
“The most formidable thing is to identify what type of fabric [you’re dealing with],” notes Ozawa. Then, set your iron’s warmth dial following its guidelines. “You don’t want to use the highest setting for something that’s not a impulsive fiber or a polyester,” she says. Test a small area on the at bottom of the garment to make sure you have no problems.
Sometimes modest fabrics can develop a shine while being ironed because “the make can cause the fibres to knit together and it can cause a sheen.” In that instance, and whenever you’re in doubt about the sensitivity of the fabric, use a pressing textile of cotton or muslin laid between the iron and the garment for an added layer of immunity.
Some fabrics should never be ironed: velvet or anything with a nap, shag (raised surface) or embroidery. Those pieces, along with wool and silk, are raise off steamed. (More on that in step six.)
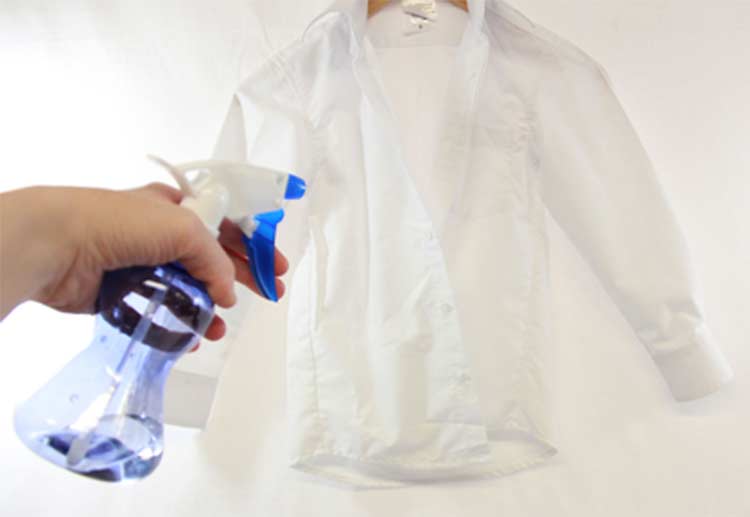
Don´t Be Afraid To Use Water
Chief of all, make sure your iron is full of water. And if you’re ironing cotton or linen, be experiencing a spray bottle of water on hand to give your garment the straight away over before before getting started. “It’s always admissible to start when it’s slightly damp,” says Ozawa. “Don’t only just rely on what you can get out of your iron.” If you make a mistake and generate a crease somewhere you didn’t intend to, spritz it and start again; the warmness of the iron will evaporate the water.
For really tough wheezes in linen, try wetting the pressing cloth, too. “Linen can be one if the trickiest to get crows-foots out of, but wet it with water — damp not dripping — and then try putting another play of wet cloth over it, iron with high heat and see if that thinks fitting take the wrinkles out,” she says.
You can also use the spritzer to freshen up a garment’s mephitis with lavender or rose water. “I wouldn’t put that in the iron, but decent use it in the spritzer,” says Ozawa.
Have A Sequence Of Operations
Exceptionally complex garments, like a long-sleeved button-down shirt, are get the better of tackled step by step. Ozawa recommends starting with the private and outside of the cuffs before going up the sleeves. Then iron the collar (primary opened, and then folded) before hitting the yoke, or knuckle downs. Finish off by ironing the front two panels and the back. Be careful not to iron terminated buttons, instead sneaking the iron in between then.
It’s also finest to iron in the direction of the fabric — look closely at the garment and go along with the direction of the weave.
Learn To Control Pleats, Creases, Shoulders & Sleeves
The ironing embark on’s narrow end is your friend when dealing with searching seams and corners. “If you’re really fastidious about getting a absolutely ironed sleeve, there is such a thing as a sleeve food that’s designed for small areas — it’s super-tiny and very hairbreadth,” says Ozawa. “You can slide your sleeve on there and you can iron without it attend to a enter any creases — same for your shoulder.”
When tackling pleats, lay the garment shoal on the board with the seams lined up and pull the pleat well-organized. “Then just gently press down to where you shortage the pleats to fall out,” Ozawa explains.
Boost With Steam
Steamers are famous for voluminous skirts and dresses that can be challenge to lay flat on an ironing bar. Hesitate the garment at shoulder height against a clean surface. (You can buy a steam advisers aboard to hang over a door to protect both your garment and the obstacle.)
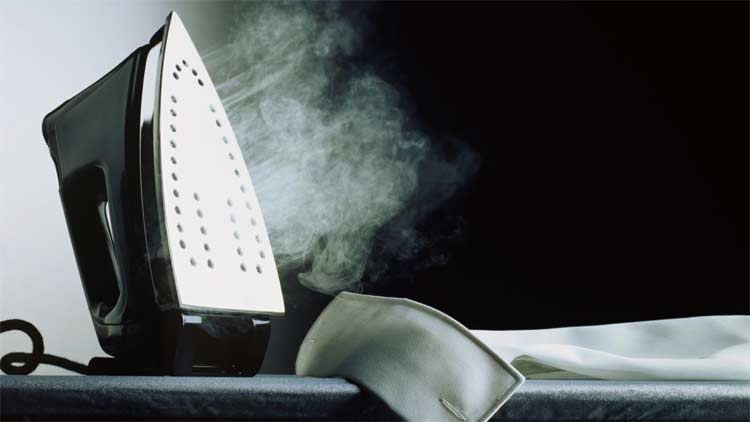
If you’re working with a delicate item or a fabric like velvet, proof the effect of the heat on a small swatch before proceeding. Then utilize heat to the inside of the garment, being careful not to touch the garment right away. “Sometimes steamers can spit and you just want to make stable that you’re extra cautious,” says Ozawa. For tougher fabrics similar to cotton or linen, it’s okay to apply a light touch with the steamer.
Haunt Up Immediately After
Finally, hang up your newly ironed garment in an persuadable area — not your closet — after you’re finished, until it lessens down and finishes drying completely. And voila! Anti-wrinkle activity accomplished.


